Have you ever finished sewing a garment, only to have a seam pop the first time you wear it? Or maybe you’ve noticed the inside of a store-bought shirt looks neat and tidy, while your handmade clothes look a bit, well, messy on the inside. The secret often isn’t your sewing machine or your skill level. It’s the choice of the seam itself. Just like a carpenter chooses a specific joint for different parts of a house, choosing the right Nahttypen (seam types) is the foundation of professional, durable, and beautiful sewing.
In the world of textiles, a seam is simply the line where two pieces of fabric are joined. But that simple definition hides a world of complexity. The seam you choose affects everything from how your garment drapes and feels to how long it will last in the washing machine. Think of it like choosing the right glue for a project: you wouldn’t use school glue to fix a broken ceramic mug, right? The same logic applies to sewing.
This guide will walk you through everything you need to know about Nahttypen. We’ll break down the two main families of seams, explore the most common specific types, and help you decide which one to use for your next project. Let’s dive in and make those seams sing!
The Two Main Families: Overlapped vs. Butt Seams
When you strip it all down, almost every seam construction in garment sewing falls into one of two categories. Understanding this fundamental split is your first step to mastering Nahttypen.
1. Overlapped Seams (Durchnähte Nähte)
This is the family that most beginners think of first. In an overlapped seam, one piece of fabric is simply placed on top of the other, and you sew through both layers. The classic example is a topstitched seam on a pair of jeans or attaching a patch pocket. The needle and thread literally go “through” the layers. These seams are incredibly strong and simple to execute, making them perfect for construction and decorative topstitching.
2. Butt Seams (Stoß-an-Stoß Nähte)
These are a bit more advanced conceptually but are everywhere in your wardrobe. In a butt seam, the two fabric edges are placed flush against each other, edge to edge, without overlapping. They are then joined by a separate element, like an overlook (serger) stitch that wraps around both raw edges, or a strip of fabric binding them together. Think of the seam on the side of a t-shirt. The raw edges are finished together by the overlock stitch, which prevents fraying and allows the seam to stretch with the knit fabric. These seams are essential for knits and for creating very flat, low-bulk joins.
Nahttypen at a Glance: A Quick Comparison Table
To help you visualize the differences, here’s a handy table comparing the most common seam types you’ll encounter. Imagine this as your quick-reference cheat sheet.
| Nahttyp (Seam Type) | Family | Best For | Key Characteristic |
|---|---|---|---|
| Plain Seam | Butt | Wovens (when finished) | The basic seam; two pieces stitched and raw edges are finished separately. |
| French Seam | Butt | Sheer fabrics, delicate blouses | A self-enclosed seam that hides all raw edges; looks beautiful inside and out. |
| Flat-Felled Seam | Butt | Jeans, menswear shirts, durable outerwear | Super strong, flat, and durable with two rows of stitching; all raw edges enclosed. |
| Overlock / Serger Seam | Butt | Knits, wovens (for quick finishing) | Seams, trims, and finishes in one step; essential for stretchy fabrics. |
| Bound Seam | Butt | Unlined jackets, heavy fabrics, historical costume | Raw edges are encased with a separate strip of fabric (bias binding). |
| Lapped Seam | Overlapped | Attaching yokes, waistbands, patches | One layer is laid over another and stitched; strong and often decorative. |
| Cover / Flatlock Seam | Butt | Athletic wear, decorative stitching on knits | A flat, stretchy seam often done with a coverstitch machine; looks like the hem on a store-bought tee. |
Deep Dive into the Most Common Nahttypen
Now, let’s get into the nitty-gritty of each seam. Think of this as your personal tour through the seam shop.
The Workhorse: The Plain Seam
This is where most sewing journeys begin. You place two pieces of fabric with their right sides together and stitch a straight line a set distance from the edge (this distance is called the seam allowance). That’s it! However, in its basic form, the raw edges are exposed on the inside and will fray. So, the “plain seam” is almost always followed up with a seam finish, like a zigzag stitch or pinking shears, to stop the fraying. It’s the starting point for countless projects.
The Elegant Solution: The French Seam
A common misconception is that French seams are difficult. They aren’t; they just require a tiny bit of planning. Imagine you want the inside of your garment to look as beautiful as the outside, especially on a sheer fabric like chiffon where raw edges would be visible. The French seam is your answer.
First, you sew the fabrics with their wrong sides together with a narrow seam allowance. Then, you trim that seam allowance down, flip the fabric so the right sides are now together, and sew again with a slightly wider seam allowance. This second line of stitching encases the raw edges completely. It’s like a little fabric tube protecting the edge. It’s a hallmark of high-quality garment construction.
The Rugged Individualist: The Flat-Felled Seam
If a seam could be described as “tough as nails,” this would be it. The flat-felled seam is what gives your favorite pair of jeans their iconic look and incredible durability. It’s strong, flat, and has two parallel lines of stitching visible on the outside.
To create it, you sew a plain seam with wrong sides together, press both seam allowances to one side, trim the underneath one down, and then fold the top seam allowance over the trimmed one, tucking the raw edge under. You then stitch close to the folded edge, securing everything down. This seam is completely enclosed, incredibly strong, and lies perfectly flat. You’ll also find it on the side seams of classic button-down shirts. Brands like Levi’s have built a legacy on this particular Nahttyp.
The Knit Whisperer: The Overlock Seam
Walk into any professional sewing studio, and you’ll hear the whir of serger machines. An overlock stitch (or serger seam) is the standard for sewing with knits. Its magic lies in its ability to stitch, trim, and finish the edge all in one go. The threads literally wrap around the raw edge of the fabric, creating a flexible, professional-looking finish that can stretch with the fabric. If you try to sew a t-shirt with a plain seam on a standard sewing machine, the stitches will pop the first time you pull the shirt over your head. The overlock seam prevents this by building stretch right into the seam itself.
The Showstopper: The Bound Seam
This is the method used on the inside of many unlined jackets and coats. Instead of just finishing the edge, you actually cover it with a separate strip of fabric, most commonly bias tape. The bias tape, cut on the diagonal of the fabric, has a bit of stretch that allows it to mold smoothly around curved edges. You sew one side of the tape to the raw edge, then fold it over to the other side and stitch it down, completely encasing the raw edge. It’s a beautiful, durable, and slightly more advanced technique that adds a real touch of luxury to a handmade garment.
How to Choose the Perfect Nahttyp for Your Project
Feeling overwhelmed by the options? Don’t be. Here’s a simple way to think through your decision.
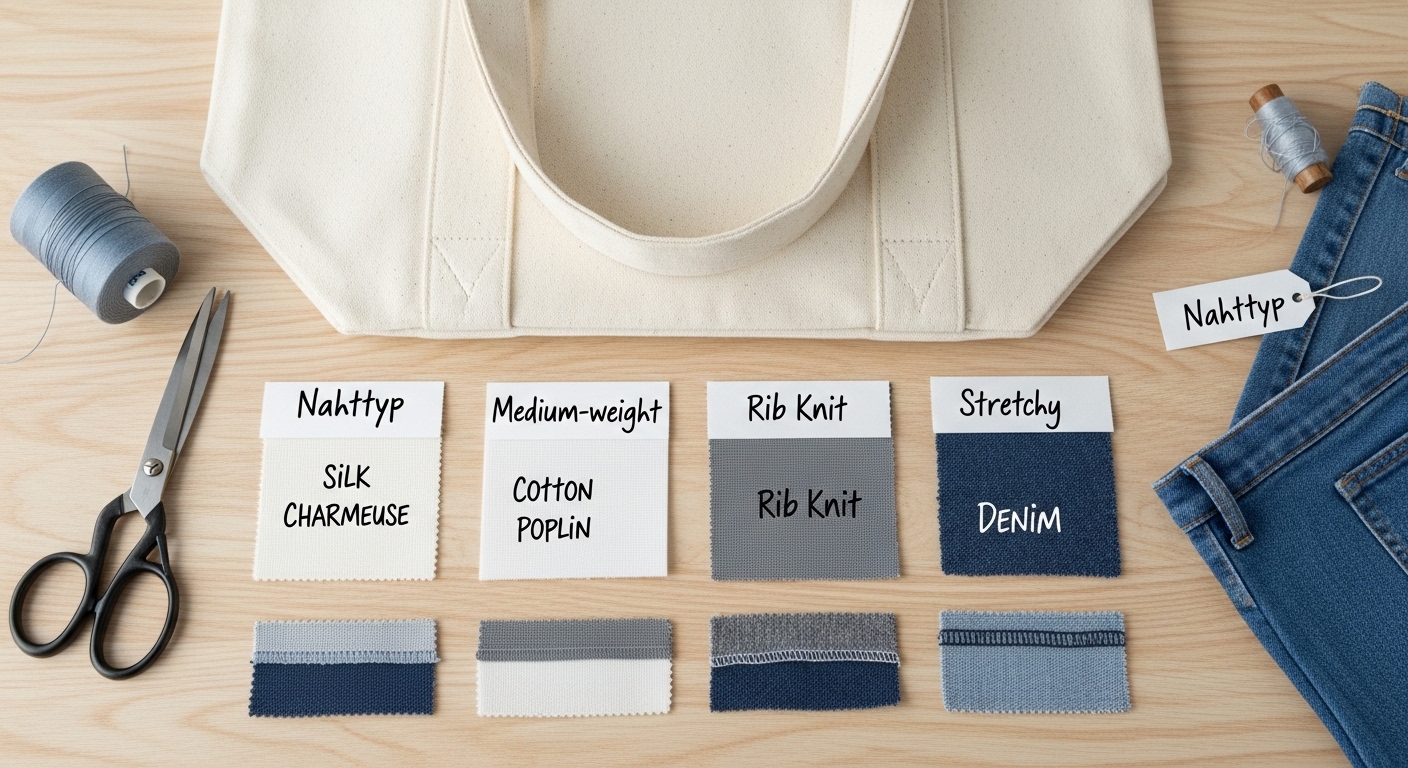
- Fabric First: Is your fabric a woven (like cotton, linen, or silk) or a knit (like jersey or rib knit)? For knits, you almost always need a seam that stretches, pointing you toward an overlock seam or a special stretch stitch on your regular machine. For wovens, you have more options.
- Consider the Weight: A heavy denim or canvas would create massive bulk if you tried to use a French seam. A flat-felled or simple lapped seam is a much better choice. Conversely, a delicate silk charmeuse calls for a delicate, low-bulk seam like a French seam.
- Think About Function: Will this seam need to endure a lot of stress, like on a pair of trousers or a bag strap? You need strength, so opt for a flat-felled or a reinforced plain seam. Is the garment for a special occasion where the inside finish matters? A French or bound seam is the way to go.
- Match Your Machine: Do you have a serger? If yes, the world of knits and quick finishing is your oyster. Do you only have a basic sewing machine? That’s fine! You can create French seams, flat-felled seams, and finish edges with a zigzag stitch. Knowing your equipment’s limits is just as important as knowing your fabric.
Seams and Machines: Finding Your Perfect Partner
Your choice of Nahttyp is often dictated by the tools you have.
- Standard Sewing Machine: Your workhorse for plain seams, French seams, flat-felled seams (with a bit of practice), and topstitching. You can also use zigzag or overcast stitches to finish plain seam edges.
- Serger (Overlock Machine): The king of knit seams. It creates an overlock seam almost exclusively, but it’s the fastest, most professional way to handle stretch fabrics and finish woven edges simultaneously. Many home sewists consider it a game-changer.
- Coverstitch Machine: This machine creates the professional hems you see on the bottom of t-shirts and athletic wear. It creates a flat, stretchy stitch on the top and a looped stitch on the back. It’s the final piece of the puzzle for a truly professional-looking knit garment.
Conclusion: 5 Practical Tips for Perfect Seams
Choosing the right Nahttypen is a skill that elevates your sewing from hobbyist to maker. It’s the attention to these small details that makes a garment look and feel professional. Here are your key takeaways:
- Always Test First: Before you start your project, sew a test seam on a scrap of your actual fabric. Check the tension, the stretch, and the appearance.
- Finish as You Go: Don’t leave all your seam finishing for the end. Finish each seam as soon as it’s sewn for a neater process and result.
- Press, Don’t Iron: Pressing your seams open or to one side is crucial for a professional finish. Use an up-and-down motion, not a sliding glide, to avoid distorting the fabric.
- Match the Seam to the Stress: Think about where the garment will experience the most pull. Reinforce those areas with a stronger seam or additional stitching.
- Embrace the Process: Don’t be afraid to try a new seam type. Start with a simple French seam on a pillowcase or a flat-felled seam on a tote bag. Practice is the only way to build confidence.
What’s your favorite seam to sew, or which one are you most excited to try? Share your thoughts in the comments below!
You May Also Like: What is Pyjamaspapper? A Beginner’s Guide to Cozy Paper Crafts
Frequently Asked Questions
What is the difference between a seam and a seam finish?
A seam is the actual join connecting two pieces of fabric. A seam finish is a treatment applied to the raw edges of the seam allowance to prevent them from fraying. For example, a plain seam is the join, and a zigzag stitch along the raw edge is the seam finish. Some seams, like a French seam, incorporate the finish into the seam itself.
Do I need a serger to sew knits successfully?
No, you don’t need one, but it makes it much easier and gives a professional result. You can sew knits on a regular sewing machine using a narrow zigzag stitch, a stretch stitch (often looking like a lightning bolt), or a ballpoint needle designed to separate fabric fibers rather than pierce them. However, a serger creates the most durable and flexible seam for stretch fabrics.
My flat-felled seam is too bulky. What am I doing wrong?
Bulk is a common issue, especially with medium to heavy fabrics. The trick is to trim the inner seam allowance more aggressively before folding the top one over. Also, using a hammer (yes, a real hammer!) to gently pound the finished seam on a hard surface can help soften the fibers and make it lie flatter, a technique often used in denim construction.
What is the strongest seam type?
For durability and strength, the flat-felled seam is widely considered the strongest common seam type. Its construction with two rows of stitching and completely enclosed raw edges creates a bond that can withstand a tremendous amount of stress, which is why it’s used on jeans and workwear.
Can I use a French seam on a curve?
Yes, you can, but it requires patience. The key is to sew the first line of stitching very slowly and carefully, gently guiding the fabric around the curve. Then, when you trim the seam allowance, trim it slightly narrower on the inner curve to allow the fabric to turn smoothly for the second line of stitching. Basting (temporary hand stitching) the curve first can also be a huge help.
What does “seam allowance” mean?
Seam allowance is the distance between the raw edge of the fabric and the line of stitching. Most patterns will specify the seam allowance, commonly 5/8 inch (1.5 cm) or 1/2 inch (1.2 cm) in garment sewing. Maintaining a consistent seam allowance is crucial for your pieces to fit together correctly.
What are those seams on the sides of my running tights? They lay completely flat.
That is most likely a flatlock seam, often done with a special stitch on a coverstitch or serger machine. The two pieces of fabric are placed edge to edge, and the stitching creates a very flat, strong, and highly stretchy join that is comfortable against the skin during high-motion activities.